MailKit is an open-source NuGet package used for sending emails. It has over 80 million downloads on the NuGet store.
Benefits of Using MailKit Library
Here are some key benefits of using this library:
- Cross-platform
- Open-source
- High performance
- Improved security by supporting SSL/TLS
How to Implement It in .NET 6
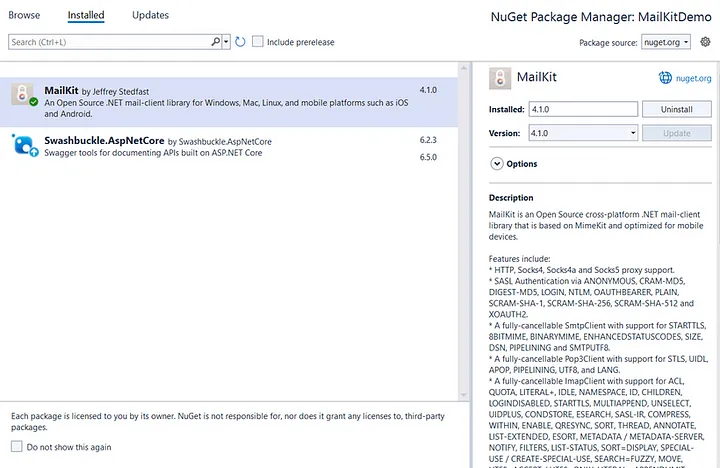
Step 1: Install the MailKit NuGet Package
Step 2: Set Up Your SMTP Server Details
In my appSettings, I’ve created an EmailConfiguration section and added all necessary information. Since I’m using Gmail to send emails, the host is set to smtp.gmail.com.
{
  "Logging": {
    "LogLevel": {
      "Default": "Information",
      "Microsoft.AspNetCore": "Warning"
    }
  },
  "EmailConfiguration": {
    "Port": "587",
    "Host": "smtp.gmail.com",
    "Password": "wRonGpASSworD",
    "From": "this-is-dummy@gmail.com"
  },
  "AllowedHosts": "*"
}
Note: The password mentioned in the configuration is not your Gmail account password. Instead, it’s a password generated specifically for sending emails.
To generate this password, follow these steps:
- Open Gmail → Click on Manage Google Account
- In the Search Google Account section, type App Passwords → This window will show up:
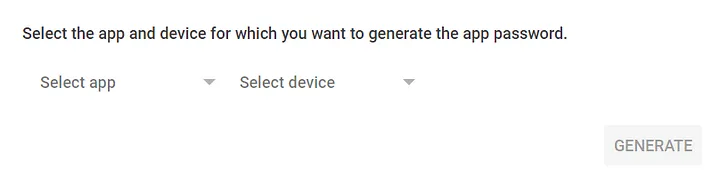
- For App, select Mail. For Device, select Windows Computer. Then, click Generate. The generated password should be added to your appSettings.
Step 3: Create a New Service for Email
public class EmailService : IEmailService
{
    private readonly EmailConfiguration _emailConfig;

    public EmailService(IOptions<EmailConfiguration> emailConfig)
    {
        _emailConfig = emailConfig.Value;
    }

    public void SendEmail(SendEmailDto emailDto)
    {
        var email = new MimeMessage
        {
            Subject = emailDto.Subject,
            To = { MailboxAddress.Parse(emailDto.To) },
            Body = new TextPart(TextFormat.Html)
            {
                Text = emailDto.Html
            },
            From = { MailboxAddress.Parse(_emailConfig.From) }
        };

        using (var smtp = new SmtpClient())
        {
            smtp.Connect(_emailConfig.Host, _emailConfig.Port, SecureSocketOptions.StartTls);
            smtp.Authenticate(_emailConfig.From, _emailConfig.Password);
            var response = smtp.Send(email);
            smtp.Disconnect(true);
        }
    }
}
Step 4: Register Dependencies
Register the dependencies of your EmailService and EmailConfiguration.
var builder = WebApplication.CreateBuilder(args);
var configuration = builder.Configuration;

builder.Services.Configure<EmailConfiguration>(configuration.GetSection("EmailConfiguration"));
builder.Services.AddScoped<IEmailService, EmailService>();
Now, inject IEmailService wherever you need it, and you’re good to go!
Whenever you're ready, there are 3 ways I can help you:
- Subscribe to my youtube channel : For in-depth tutorials, coding tips, and industry insights.
- Promote yourself to 9,000+ subscribers : By sponsoring this newsletter
- Patreon community : Get access to all of my blogs and articles at one place